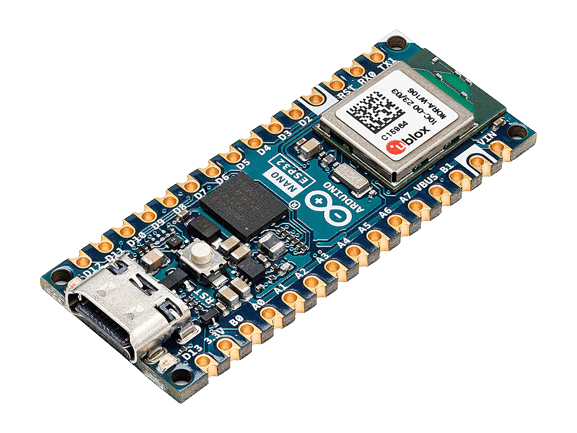
Arduino Nano ESP32 ek powerful, tiny development board hai jo WiFi aur Bluetooth dono support karta hai. Yeh board khas taur par MicroPython support karta hai, jisse rapid prototyping aur IoT projects bahut asaan ho jate hain. Is guide mein hum setup se lekar basic coding, WiFi/Bluetooth examples, bootloader switch, aur common troubleshooting sab kuch step-by-step cover karenge.
क्या खास है is board mein?
- Chhota form factor (Nano size) — breadboard friendly
- Built-in WiFi (802.11) aur Bluetooth (Classic / BLE)
- MicroPython firmware ko support karta hai — Python se seedha coding
- Arduino IDE ke saath bhi use kiya ja sakta hai (bootloader mode main)
- GPIOs, ADC, PWM, UART, I2C, SPI etc. standard ESP32 features available
आवश्यकताएँ (Prerequisites)
- Windows / macOS / Linux computer with USB port
- USB-C / USB-Micro cable (board ke USB port ke mutabiq) — data cable hona chahiye
- Arduino Nano ESP32 board
Arduino Lab for MicroPython(editor) — Arduino ki official site se install karen- Optional: Arduino IDE (agar aap bootloader/Arduino sketches use karna chahte hain)
पहले step — Arduino Lab for MicroPython install karna
- Arduino ki official website se Arduino Lab for MicroPython download aur install karein. (Installer OS specific hota hai.)
- Editor open karein — yeh MicroPython scripts edit, run aur board par firmware flash karne ke liye bana hai.
- Board connect karein: USB cable se Nano ESP32 ko computer se lagayen. Device manager / system profiler se COM port ya device show hoga.
Note: Agar aap Mac/Linux use karte hain to shayad USB driver install karne ki zarurat pade (CH340/CP210x etc.) — board ke chip ke hisaab se.
dusra step — MicroPython firmware install (flash)
Important: Jab tak MicroPython firmware board par install na ho, tab tak board MicroPython ke features nahi chalenge.
- Arduino Lab open karen → Tools / Board / Firmware (ya similar option) mein jayein.
- “Install Firmware” ya “Flash MicroPython” option choose karein. Editor aapke connected COM port ko detect karega.
- Flash process start karein — progress bar dikhayi dega. Flash complete hone par editor message dega.
- Flash ke baad board automatic reboot ho sakta hai; ab aap MicroPython REPL (serial console) access kar sakte hain.
MicroPython se pehla test — LED blink (Step by step)
Ye code board par run karke check karein ki firmware sahi se install hua:
from machine import Pin
import time

myLED = Pin(0, Pin.OUT)   # LED pin: board-specific; many Nano-ESP32 use GPIO0 ya onboard LED pin
while True:
    myLED.value(1)        # LED ON
    time.sleep(1)
    myLED.value(0)        # LED OFF
    time.sleep(1)
Steps to run:
- Arduino Lab mein naya file banayein, upar code paste karein.
- Save as
main.py(yaboot.pyagar aap startup pe chalana chahte hain). - Upload / Run button dabayein — agar LED blink karne lage to setup sahi hai.
Bootloader mode — Arduino IDE ke liye
Agar aap Arduino IDE mein yeh board use karna chahte hain (C/C++ sketches), to board ko bootloader mode mein shift karna hota hai:
Bootloader mode steps (common method):
- Reset button ek baar press karein.
- Dobara press karein aur jaise hi green LED flash kare, aapka board bootloader mode mein aa gaya.
- Ab Arduino IDE open karein → Tools → Board select karein (jo Nano ESP32 option ho) → Port select karein → Sketch upload karein.
Bootloader mode ka exact behavior board variant ke hisaab se thoda alag ho sakta hai — manual dekh lena useful hai.
WiFi connect karna — MicroPython example
MicroPython mein WiFi connect karne ka basic example:
import network
import time

ssid = 'YourSSID'
password = 'YourPassword'

wlan = network.WLAN(network.STA_IF)
wlan.active(True)
wlan.connect(ssid, password)

count = 0
while not wlan.isconnected() and count < 15:
    print("Connecting...", count)
    time.sleep(1)
    count += 1

if wlan.isconnected():
    print("Connected, IP info:", wlan.ifconfig())
else:
    print("Failed to connect")
Use case tips:
- Static IP chahiye to
wlan.ifconfig(('ip','subnet','gateway','dns'))use karen. - IoT projects mein OTP / token based authentication ya HTTPS use karein for security.
Bluetooth (BLE) basic idea & MicroPython snippet
ESP32 BLE MicroPython implementation mein ubluetooth module ka use hota hai (module ka naam firmware version pe depend karta hai).
Simple BLE advertising example (pseudo / simplified):
import bluetooth
from time import sleep

ble = bluetooth.BLE()
ble.active(True)

# Simple advertising payload (name)
name = 'NanoESP32'
adv_payload = bytearray('\x02\x01\x06' + chr(len(name)+1) + '\x09' + name, 'utf-8')
ble.gap_advertise(100_000, adv_payload)  # advertising interval in us

print("Advertising as", name)
while True:
    sleep(1)
Note: BLE services/characteristics add karne ke liye aapko
bluetoothmodule mein GATT server setup karna hoga — yeh thoda advanced hai. Official MicroPython/ESP32 docs mein detailed example dekhein.
Filesystem & REPL
- MicroPython board ke paas internal filesystem hota hai —
main.pyyaboot.pymein aap startup scripts rakh sakte hain. - REPL (serial console) se aap live commands run kar sakte hain — debugging ke liye bahut useful.
- Files upload karne ke liye Arduino Lab ka file manager ya
ampy,mpfshelljaise tools use hotey hain (agar aap terminal tools use karte hain).
Common IoT project ideas (Arduino Nano ESP32 se)
- Home automation (lights, fans) — WiFi + MQTT + mobile app
- Remote sensor (temperature/humidity) — ESP32 → WiFi → Cloud / Firebase
- BLE proximity lock / attendance system
- Web server hosting small control panel (ESP32 built-in webserver)
- MicroPython based data logger to SD card / cloud
Troubleshooting (Common problems & fixes)
- Board not detected: USB cable data nahi kar rahi; dusri cable try karein. Driver install karein (Windows: CP210x/CH340).
- Firmware flash fail: Board reset steps sahi karein; correct COM port choose karein; try different USB port.
- WiFi not connecting: SSID/password sahi check karein; 2.4GHz network use karein (ESP32 generally 2.4GHz).
- BLE not advertising: Firmware mein BLE support check karein; power cycle karein.
- Code errors indent/Tab: MicroPython Python hai — indentation strict hai; tabs vs spaces consistent rakhein.
Best practices & security tips
- Production IoT devices mein plain text WiFi credentials avoid karein — use secure token storage or provisioning.
- OTA (Over The Air) updates consider karein agar product deploy kar rahe hain.
- Debug logs ko remove karein release builds mein (for performance & security).
- Keep firmware updated — MicroPython/board vendors updates security fixes de sakte hain.
FAQ (Quick)
Q: Kya Arduino Nano ESP32 beginners ke liye sahi hai?
A: Haan — MicroPython support ki wajah se Python jante hue beginners jaldi start kar sakte hain. Advanced features ke liye C/C++ bhi available.
Q: Kya main Arduino IDE aur MicroPython dono use kar sakta hoon?
A: Haan — aap MicroPython flash karke Python run karein; aur agar Arduino IDE use karna ho to board ko bootloader mode mein daal kar fir Arduino sketches upload karein.
Conclusion
Arduino Nano ESP32 ek flexible aur powerful board hai jo WiFi aur Bluetooth ke saath MicroPython ka bhi full support deta hai — isse beginners aur advanced developers dono ko fayda hota hai. Is guide ne setup, MicroPython flashing, LED test, WiFi/Bluetooth snippets, aur troubleshooting cover kiya — ab aap apne DIY IoT projects start kar sakte hain.