In this digital era, automation is transforming educational institutions across the globe. One of the most critical administrative tasks that benefit from automation is attendance management. A Secure College Attendance System built with RFID technology, relays, and a Real-Time User Control Dashboard offers a seamless and efficient way to track attendance and manage access to educational facilities. In this post, we will guide you through building such a system from scratch using ESP32, RFID readers, and IoT technologies.
Project Overview
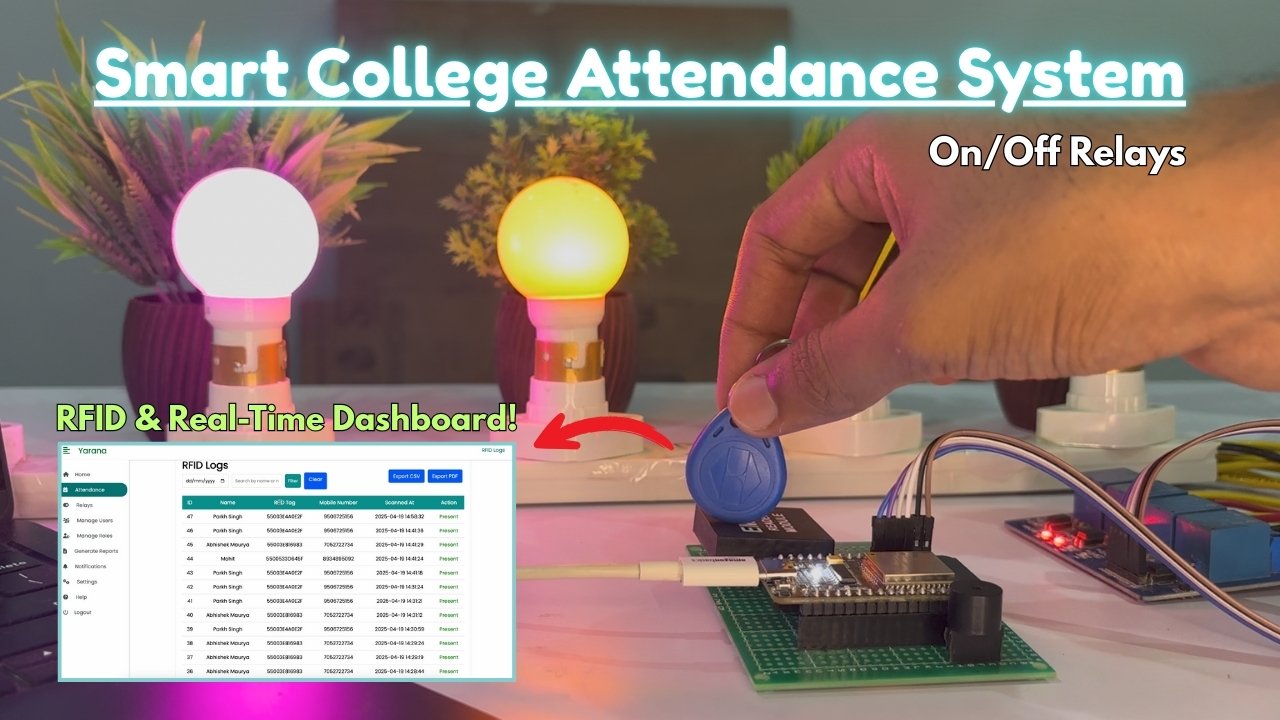
Our RFID-based College Attendance System ensures real-time attendance tracking, access control, and efficient user management, all from a real-time web-based dashboard. This system uses RFID cards to track student attendance, controls relays for devices (such as doors or lights), and stores attendance data on a cloud server that can be easily accessed through a secure admin panel.
This system is ideal for engineering students, final-year projects, and educational institutions looking for an efficient and scalable solution to automate attendance tracking.
Key Features of the Project
- RFID Attendance Tracking
- Uses EM-18 RFID Reader to scan RFID cards, logging each student’s attendance.
- Real-time data is sent to a cloud server for processing and storage.
- Relay Control System
- Controls devices like doors or lights via relays. The system can turn devices ON or OFF depending on attendance or time schedules.
- Real-Time Web Dashboard
- Admins can manage the attendance system through a secure web dashboard.
- Features like viewing attendance logs, managing users, and controlling relays are accessible in real-time.
- Secure Data Handling
- The system stores unsent RFID data in the EEPROM in case of network failures, ensuring no attendance data is lost.
- User Management
- The dashboard allows admins to add, edit, and manage users, assign RFID cards, and download reports in CSV or PDF formats.
- Scalability
- Whether for small classrooms or large campuses, the system can be easily scaled and adapted to different needs.
How It Works:
- RFID Card Scanning
- Students use their RFID cards to scan into the system. The EM-18 RFID Reader connected to the ESP32reads the unique 12-character RFID tags and logs the student’s attendance.
- Server Communication
- The data is sent to a server (running PHP and MySQL), where attendance data is logged and stored.
- Relay Control
- Admins can control external devices such as doors or lights via the system’s relays. The relay state is fetched by the ESP32 every few seconds to keep the status updated.
- Real-Time Admin Dashboard
- The admin can access a secure dashboard to manage users, view attendance logs, control relays, and generate reports. The dashboard also displays a live feed of new scans and system status updates.
- Offline Handling
- In case of network failure, RFID tags are stored in EEPROM. Once the system reconnects to the network, it syncs the stored data with the server.
Step-by-Step Guide:
Hardware Requirements
- ESP32 Dev Module: For processing and Wi-Fi connectivity.
- EM-18 RFID Reader: For scanning RFID tags.
- Relay Module (4-channel): To control external devices like doors, lights, etc.
- Buzzer: Provides audible feedback on successful or failed RFID scans.
- Jumper Wires and Breadboard: For wiring the system.
- RFID Cards/Tags: Compatible with EM-18 RFID reader (125kHz).
- Power Supply: 5V power for the system.
Software Requirements
- Arduino IDE: For programming the ESP32.
- Libraries: Required libraries include WiFi.h, HTTPClient.h, EEPROM.h, ArduinoJson.h.
- MySQL Database: For storing attendance logs and user data.
- Web Server: A PHP-enabled server to host the admin panel and handle data.
Code Explanation
- ESP32 Code: The main code handles everything from Wi-Fi connection, RFID scanning, server communication, and relay control.
- It connects to a Wi-Fi network, reads RFID cards, sends data to a server, controls relays, and stores unsent data in EEPROM in case of a network issue.
- Admin Dashboard: Built with PHP, HTML, CSS, and JavaScript, the admin panel lets you control the attendance system in real-time, view logs, and manage users.
Building the System
- Connect the Hardware
- Connect the EM-18 RFID Reader to the ESP32 and set up the relay module.
- Attach the buzzer to give audible feedback on RFID scans.
- Upload the Code
- Use Arduino IDE to upload the code to the ESP32.
- Ensure your Wi-Fi credentials and server URLs are correctly configured.
- Set Up the Server
- Install a MySQL database and set up the PHP scripts to log RFID data and fetch relay statuses.
- Host the admin dashboard on your server with HTTPS enabled.
- Testing the System
- After setup, test the system by scanning an RFID card to ensure the attendance is logged in real-time.
- Test relay control from the dashboard and ensure the relays respond as expected.
Admin Panel Features
- Dashboard System
- A real-time view of all logs and system status.
- RFID Logs
- View and filter RFID scan logs by date, class, or student.
- Relay Smart Control
- Toggle relays (e.g., unlocking doors or controlling lights).
- User Management
- Add, delete, and manage users. Assign RFID tags and set roles (Admin, Teacher, etc.).
- Users Report
- Download reports in CSV or PDF for further analysis or submission.
- System Settings
- Configure settings such as college name, admin credentials, and user deletion.
Connect with Yarana IoT Guru
This project was designed by Yarana IoT Guru—your go-to source for innovative IoT tutorials and projects. We specialize in providing practical and hands-on guidance to students and tech enthusiasts.
- 📺 YouTube Channel: Yarana IoT Guru YouTube
- 📘 Facebook: Yarana IoT Guru Facebook
- 📸 Instagram: Yarana IoT Guru Instagram
- 📢 LinkedIn: Yarana IoT Guru LinkedIn
- 🐦 Twitter: Yarana IoT Guru Twitter
- 🔗 Reddit: Yarana IoT Guru Reddit
- 📁 Github: Yarana IoT Guru GitHub
🌟 Subscribe to our YouTube Channel to stay updated on all our latest IoT tutorials and project ideas.